✨ Star Trails
How long to expose for star trails
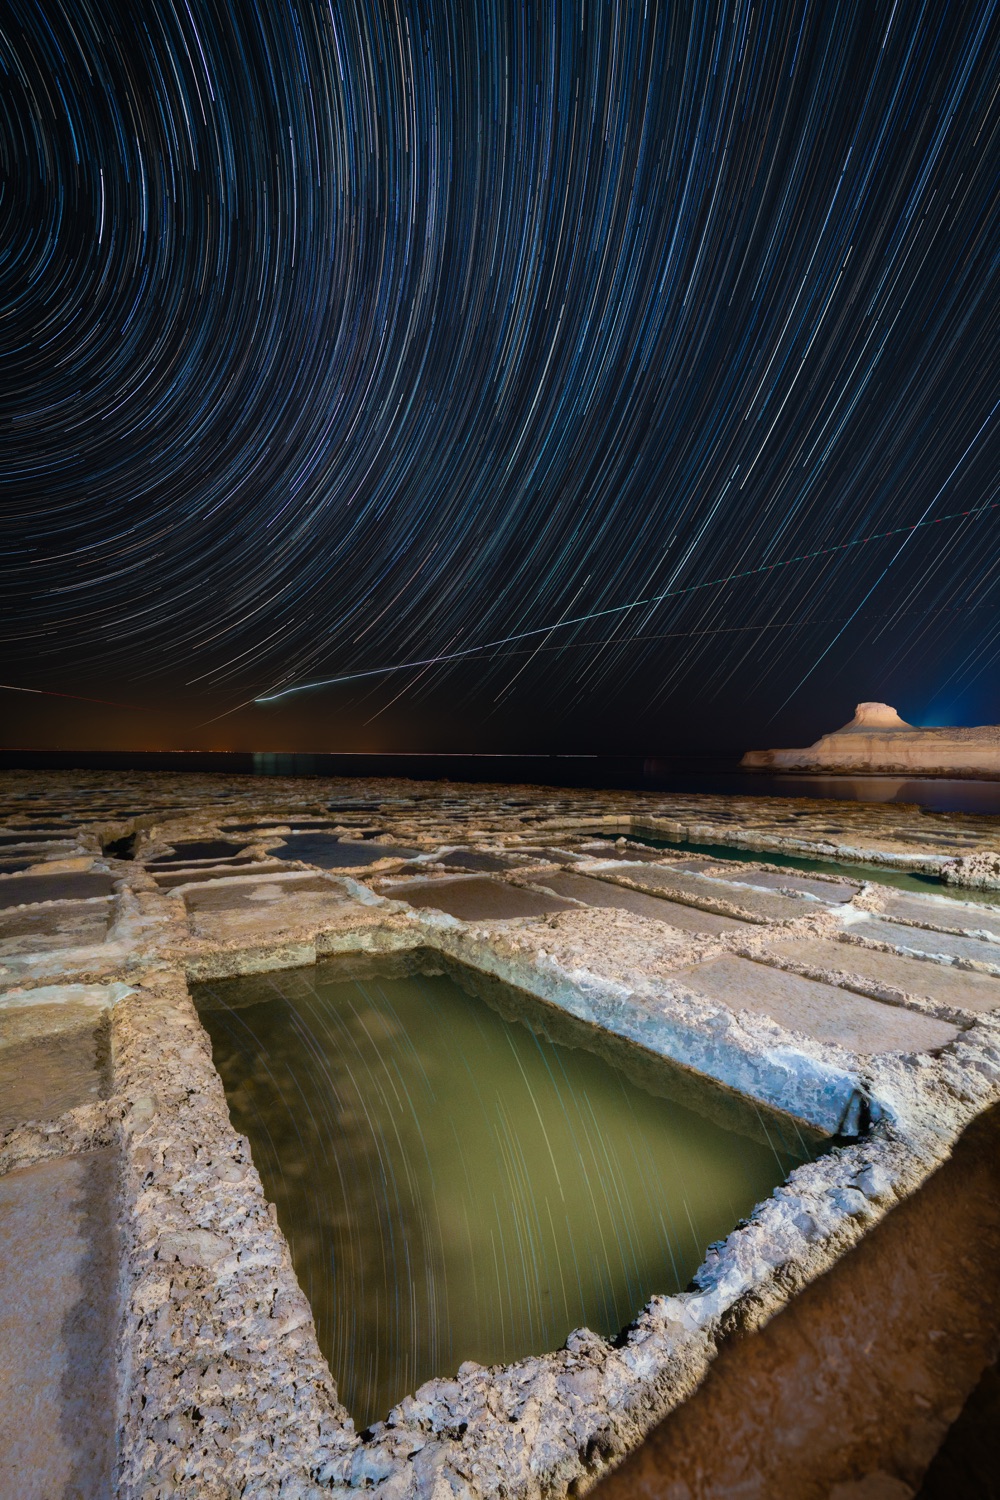
Star trail exposure time isn't luck — it's arithmetic. The sky turns at a steady, knowable rate, so the arc each star draws is simply a question of how long you leave the camera running. Once you see total time as the dial you turn, you can plan the exact look before you ever press the shutter.
A star trail photograph turns the night sky’s slow rotation into something you can see: ribbons of light arcing around a fixed point. The single most important thing to understand is that you choose how long those ribbons are, and you choose it with one number — your total exposure time. Everything else is detail. Get this one relationship into your bones and you can previsualise the finished frame before the first click.
The sky turns at a fixed rate
Earth spins once a day, so from where you stand the stars appear to wheel overhead at a steady pace: about 15 degrees per hour. (More precisely 15.04 degrees, because the sky completes a turn in a sidereal day of 23 hours 56 minutes rather than a clock day — but 15 is the number to plan with.)
Because that rate never changes, the arc a star draws is directly proportional to how long you record it. Double the time, double the sweep. That gives you a simple planning table:
| Total time | Roughly what you get |
|---|---|
| ~15 minutes | Short, comma-like dashes (~4°) — subtle motion |
| ~30 minutes | Clear streaks (~7.5°), still restrained |
| ~1 hour | A clean, graceful sweep (~15°) |
| ~6 hours | A quarter-circle arc (~90°) — bold and dramatic |
| ~12 hours (aimed at the pole) | Near-full or full circles |
These are honest approximations, not promises — atmosphere, framing, and how bright each star is all shift the visual impact. But the proportionality holds: total duration is the main dial you turn to set trail length. Note the arithmetic — a true quarter-circle (90°) is a long night, not an hour’s work; an hour buys you a clean 15° sweep, which already reads beautifully.
If you’re new to the whole technique, start with the overview in how to shoot star trails and treat this guide as the deep dive on the timing question specifically.
Why some stars streak more than others
There’s a second factor, and it’s worth understanding even though it’s not the one you control. Not every star sweeps the same arc in the same time. A star’s declination — its angular distance from the celestial equator, the imaginary line that sits directly above Earth’s equator — decides how wide it travels.
- Stars near the celestial pole (the point the whole sky appears to pivot around) barely move. They trace tiny, tight circles.
- Stars near the celestial equator sweep the widest, longest arcs.
Mathematically, the streak length scales with the cosine of declination:
star arc = (15.04°/hour × hours) × cos(declination)
A star on the equator has a declination of 0, and cos(0) = 1, so it travels the full rotation angle. A star sitting right at the pole has cos near 0, so it hardly stirs. This is exactly why trails curve around the pole — point your composition at it and you get concentric circles, with the longest arcs out at the frame’s edges.
For planning, though, you don’t compute this per star. You pick a total time, and declination simply explains the shape you’ll see across the frame. Time is the lever; declination is the texture.
Finding the pole to aim at
In the northern hemisphere you’re lucky: Polaris sits within about one degree of the north celestial pole, so it works as a near-perfect bullseye. To locate it, follow the two pointer stars on the outer edge of the Big Dipper’s bowl and extend that line about five times their separation — it lands on Polaris. A useful sanity check: Polaris’s height above the horizon roughly equals your latitude, so from 50° north it sits halfway up the northern sky.
The southern hemisphere has no bright pole star. The south celestial pole is a dim, empty patch of sky you find by extension: take the long axis of the Southern Cross and project it about four and a half times its length, past the foot of the cross, toward the horizon. Aim your composition at that blank spot and the southern stars wheel around it just the same.
Your per-frame settings stay constant
Here’s the part that surprises people: you don’t expose for an hour in one shot. You shoot a sequence of short, identical frames — commonly around 30 seconds each, at f/2.8 to f/4, with a moderate ISO — and you decide the trail length afterward by how many of those frames you stack together.
This is the real power of the modern workflow. A single multi-hour exposure blows the sky to a flat grey, and one passing car or aircraft ruins the entire frame. Thirty-second frames sidestep both problems, and they hand you a knob you can turn in post: keep 30 frames for a 15-minute trail, keep 120 frames for an hour. The per-frame exposure never changes — only the count does. Stacking combines them with a lighten (maximum) blend, which keeps only the brightest pixel at each spot — the star’s light — so every frame’s streak adds onto the last and the dark sky between them stays dark. The full method lives in stacking star trails.
So the planning question becomes two linked numbers: the total time you want, and the frame count that delivers it.
What stops you going long
If longer means more dramatic, why not always run all night? Several real-world limits push back, and a good plan respects them:
- Battery drain. Hours of continuous shooting empties a battery fast in the cold. Carry spares or external power for anything past an hour or two.
- Dew on the lens. Over a multi-hour session, moisture quietly condenses on the front element and slowly fogs your frames. A dew heater or hand-warmer band earns its place.
- Accumulating sky glow. Light pollution and any moonlight build up frame after frame. What looks fine at 20 minutes can wash pale over two hours.
- Aircraft and satellite trails. The longer you record, the more stray straight lines cross the sky. Stacking lets you drop the worst offenders, but plan for them.
None of these stop you — they just mean you choose a duration deliberately rather than “as long as possible.”
Plan it both directions
Because the relationship between time and arc is fixed, you can work it from either end, and that’s exactly what a planning tool should let you do. Set a duration and read the arc you’ll get; or pick the arc you want and read the time to leave the camera running. Viewpoint’s calculators couple the two both ways, then hand off the frame count so you know precisely how long to stay out. Browse the full set on the photography calculators page and let the numbers carry the planning, so you can spend the night watching the sky instead of doing arithmetic in the dark.
Quick-start checklist
- Pick your look first: ~15 min for short dashes, ~1 hour for a clean sweep, several hours for bold arcs, all night for circles.
- Lock per-frame settings: around 30 s, f/2.8–f/4, moderate ISO — and don’t touch them between frames.
- Compute the frame count for your target total time; an intervalometer fires them back-to-back.
- Aim at the pole for concentric circles (Polaris up north; the empty patch off the Southern Cross down south); aim at the equator for the widest sweeps.
- Budget for the limits: spare battery, dew protection, and a sky dark enough that glow won’t accumulate.
- Stack afterward with a lighten blend to set the final trail length and discard any frame spoiled by a plane or a bump.