✨ Star Trails
How to shoot star trails
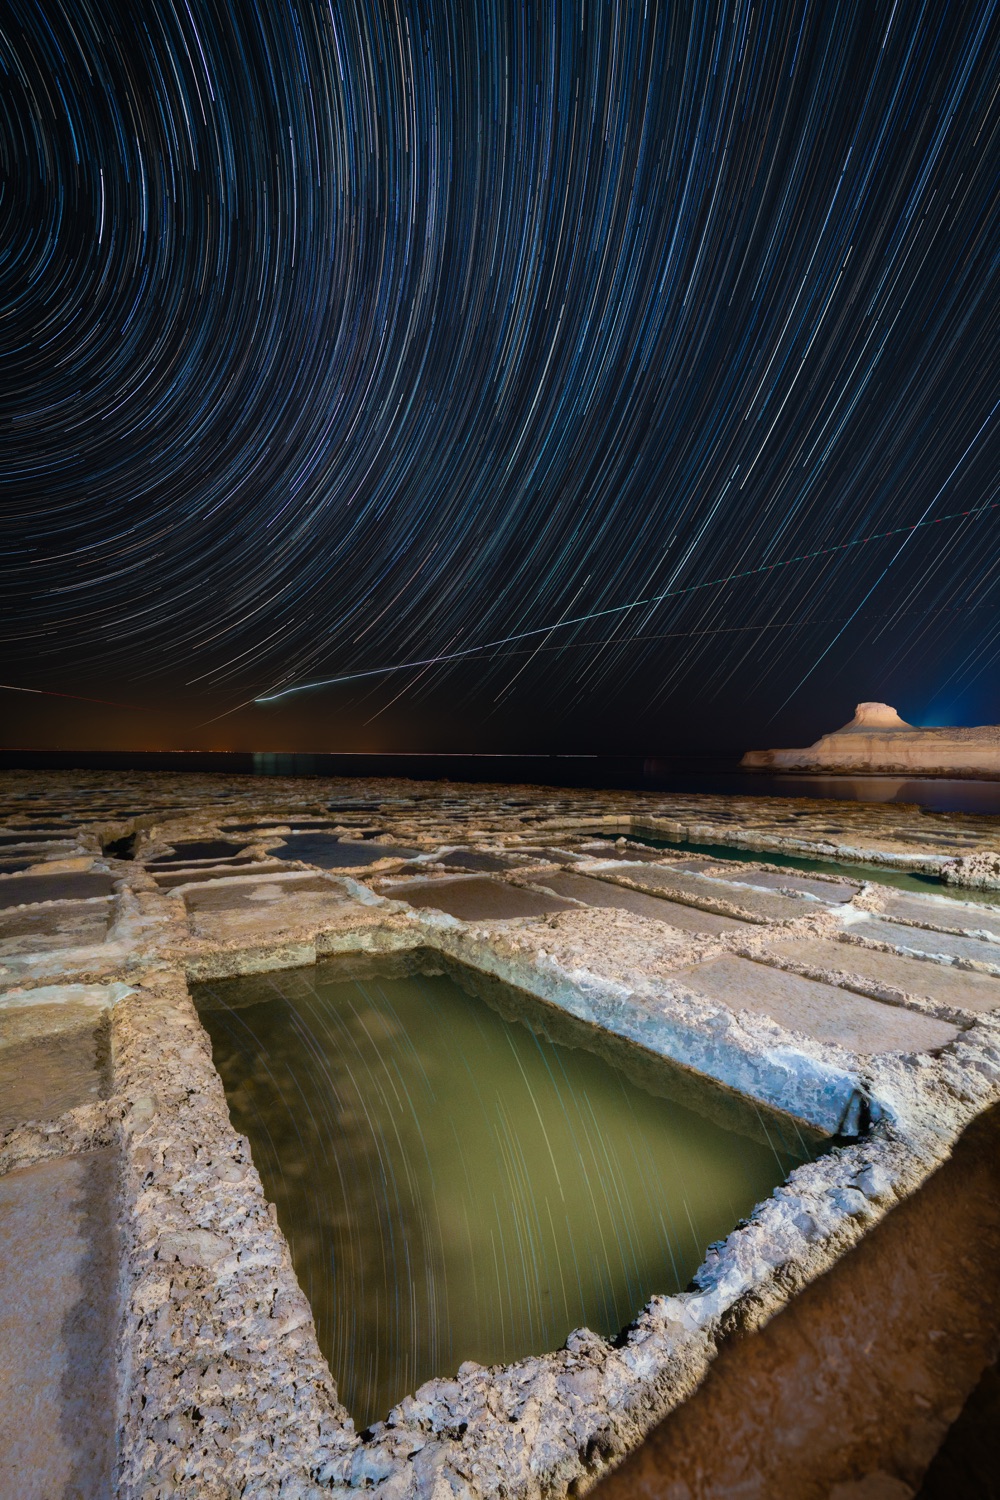
Those sweeping arcs of light over a mountain ridge aren't a happy accident or the product of exotic gear — they're just the Earth turning, recorded patiently. Once you understand which way the sky rotates and how to capture that motion without ruining a single frame, star trails become one of the most reliable shots in night photography.
A star-trail photograph is a picture of time. While your shutter is busy (or your frames are quietly piling up), the Earth keeps turning, and every star smears into a fine streak of light. Get the geometry and the method right and the result is repeatable on any clear night — no luck involved, just patience and a steady tripod.
Why the sky draws arcs
Stars don’t actually move; the Earth does. It spins once on its axis roughly every 24 hours, so from where you stand the whole sky appears to rotate at about 15 degrees per hour (a touch more precisely, 15.04°/hour, because a star-day is a few minutes shorter than a clock-day). Point your camera up for long enough and that drift gets recorded as curved lines.
The key word is curved. The sky turns around a fixed axis — an imaginary line out through the planet’s poles — and the point where that axis meets the sky is the celestial pole. Stars far from the pole sweep big arcs; stars right next to it barely budge. That’s why a star-trail image looks like a set of nested circles: you’re seeing the sky pivot around a single still point.

- In the northern hemisphere, that point sits almost exactly on Polaris, the North Star. Polaris is conveniently bright and easy to find, and its height above the horizon roughly equals your latitude — so from 50°N it rides well up the northern sky, while near the equator it hugs the horizon.
- In the southern hemisphere there’s no bright pole star. The south celestial pole is a faint, star-poor patch of sky that you locate by extending the long axis of the Southern Cross. You won’t see a marker there, but the stars will still wheel around it.
This is where planning pays off. The same scene gives you two completely different photographs depending on where the pole sits in your frame, so it’s worth knowing exactly where it will be before you set up. A tool like the AR Celestial Scout lets you hold your phone up at the actual location and see where the pole — and the arcs around it — will fall against your foreground, in daylight, hours before you shoot.
Composing around the pole
You have two broad choices, and they’re both correct — they just say different things.
- Point at the pole for concentric circles. Frame Polaris (or the southern pole region) and every star wheels around it in tidy, nested rings. This is the classic, almost hypnotic “bullseye” trail. It reads as calm and ordered.
- Shoot away from the pole for sweeping streaks. Aim east or west, well off the pole, and the stars near the celestial equator draw long, nearly straight diagonal lines. This feels faster and more dynamic, and it pairs beautifully with a strong horizontal foreground.
There’s real physics behind that difference. A star’s arc length depends on its declination — how far it sits from the celestial equator. A star on the equator traces the full rotation angle; a star near the pole traces almost nothing. Mathematically the arc is the rotation angle multiplied by the cosine of declination, which is just a precise way of saying: the closer to the pole, the shorter the streak. You don’t need to do the trig in your head — the photography calculators couple total time and arc length both ways, so you can set a duration and read the arc you’ll get, or pick the arc length you want and read back the time you need to leave the camera running.
Two ways to capture it: one long frame, or many short ones
You can record trails two ways, and one of them is much better.
The single long exposure — one shutter open for three to six hours — is the old-school method, and it’s a trap. The sensor heats up over that span, producing ugly thermal noise; the sky slowly accumulates into a washed-out grey instead of staying black; and a single mishap — a passing car’s headlights, a stray cloud, someone’s torch, a knock to the tripod — ruins the entire frame with no way to recover it. Hours of waiting, one wasted file.
Stacking many short frames is the method to learn. Instead of one marathon exposure, you shoot a continuous sequence of shorter frames — commonly around 30 seconds each — back to back for the whole session, then blend them in software afterwards. The advantages stack up (so to speak):
- Less noise. Each frame is short, so the sensor never heat-soaks the way it does in a single multi-hour exposure.
- Damage control. If a plane crosses frame 47 or a cloud drifts through, you simply drop that one frame and keep the rest. The trail closes over the gap almost invisibly.
- Flexible length. Your total duration sets the arc length, and you decide that after the fact by choosing how many frames to combine. Want longer trails? Stack more frames. Want to stop early because clouds rolled in? Stack what you’ve got.
The trade-off is that the gaps between frames must be tiny, or your smooth arcs turn into dashed lines — which brings us to the intervalometer.
Settings and the gapless interval
An intervalometer — a built-in shutter timer, an in-camera interval mode, or a cheap external remote — fires the frames automatically so you’re not standing there clicking for two hours. The single most important setting is the interval between frames: make it as close to gapless as your camera allows. Set it to your exposure time plus just a second or so for the file to write. A long gap shows up as visible breaks in every trail.
For the exposure itself, a sensible starting point:
- Shutter: roughly 20–30 seconds per frame. You’re not trying to freeze stars here, so don’t worry about the 500 or NPF “sharp-star” rules — but keep frames short enough to stay clean and to keep the gaps between them small.
- Aperture: moderately wide, around f/2.8 to f/4. You want light, but a hair of stopping-down keeps corner stars tidy.
- ISO: moderate — 800 to 1600 is a good window. Resist cranking it; you’re building the trail from many frames, so you don’t need each one to be bright.
- Focus and format: manual focus on a bright star (autofocus will hunt in the dark), and shoot RAW for the most latitude in blending.
- Stability: lock everything down. The camera must not shift even slightly between frames, or the arcs won’t line up when you stack. Turn off any lens or body stabilisation on a tripod, and switch off long-exposure noise reduction (it doubles your per-frame time and creates gaps).
A dark, moonless sky helps enormously — town glow and a bright moon both flatten the contrast that makes trails pop. The same dark-sky and moon-timing thinking that drives the how to photograph the Milky Way guide applies here, so it’s worth a read if you’re new to planning night shoots.
Foreground, light, and the blend
A field of trails over a black void is technically a star-trail photo and emotionally a screensaver. The picture lives or dies on the foreground — a lone tree, a ruined barn, a jagged ridgeline, a still lake catching the rings overhead. Anchor the composition on something solid and let the arcs be the sky’s contribution.
Because each frame is short and fairly dark, the land can come out as a silhouette. A little subtle light fixes it: a brief, soft sweep of a torch across the foreground during one of your frames (you can blend just that frame in), or simply starting your sequence during the last of blue-hour twilight so the ground retains some natural detail. Keep it gentle — the goal is a hint of form, not a spotlit subject competing with the sky.
To assemble the final image you blend the frames with a “lighten” (maximum) blend — the method dedicated star-trail stacking apps use (most are free). Lighten blending keeps, for each pixel, the brightest value across the whole stack. Since a star is brighter than the black sky it moves across, the bright pixel from every frame survives and the trail draws itself, frame by frame, into one continuous arc. It’s also why dropping a bad frame works so cleanly: remove it and only its contribution disappears. Most stackers let you save an animation of the trail growing, too — a nice bonus from the same files.
Quick-start checklist
- Scout the pole’s position in daylight and decide: concentric circles (aim at the pole) or sweeping streaks (aim away from it).
- Lock down a heavy tripod on solid ground and disable stabilisation and long-exposure noise reduction.
- Dial in ~20–30 s, f/2.8–f/4, ISO 800–1600, manual focus on a bright star, RAW.
- Set the intervalometer to a near-gapless interval (exposure time + ~1 s) and let it run for as long as you want trails.
- Light the foreground subtly — a soft torch sweep on one frame, or start during late twilight.
- Drop any ruined frames (planes, cars, clouds) before stacking.
- Lighten-blend the sequence in stacking software to build the final arcs.