⚙️ Camera & Exposure
Shutter speed: freezing and blurring motion
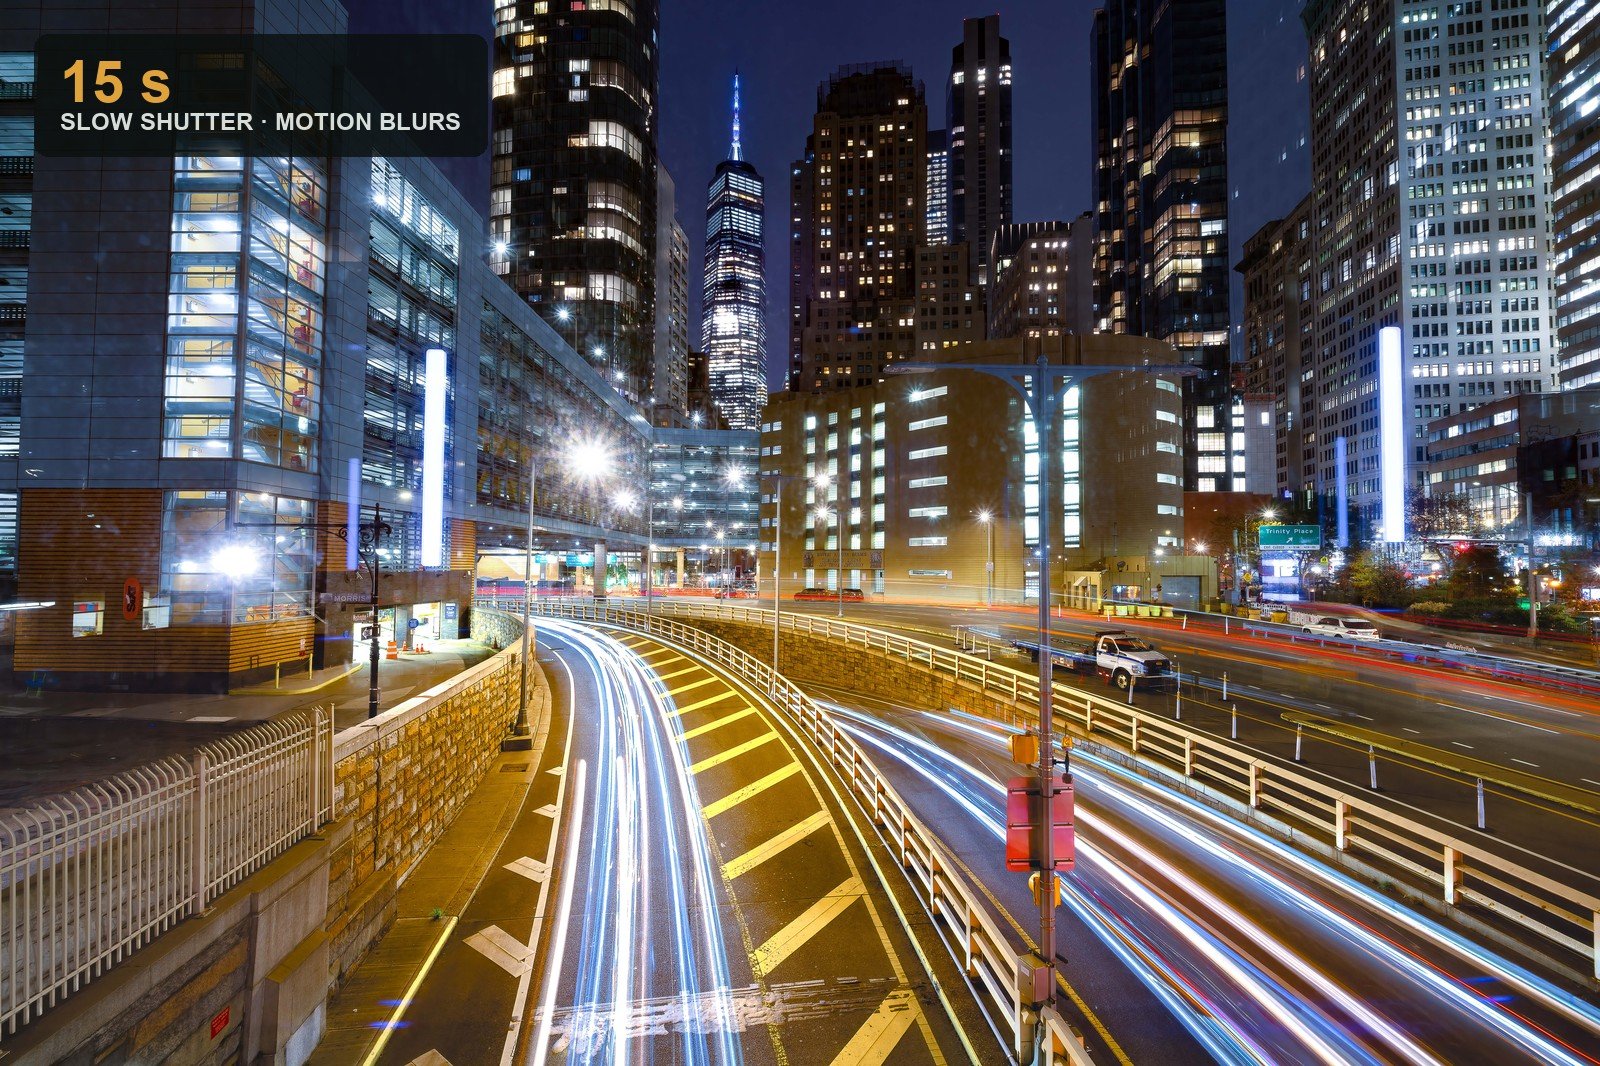
Shutter speed is the closest thing photography has to a time machine: it decides not just how bright the frame is, but what every moving thing in it actually does. A breaking wave can read as a frozen wall of suspended droplets or a soft veil of mist — same wave, same light, one dial turned.
Most beginners meet shutter speed as the dial that fixes a too-dark or too-bright photo. That’s true, but it buries the lede. Long before it’s an exposure control, your shutter speed is a creative decision about motion — it’s where you choose whether a waterfall looks like crashing chaos or flowing silk, whether a flock reads as frozen wings or a smear of energy. The exposure side matters too (it’s one leg of the exposure triangle, and the plain definition lives in the glossary), but the decision that shapes your photo is this: what do you want motion to do in the frame? Pick the effect first, then dial the speed that delivers it.
Fast shutter: freezing the moment
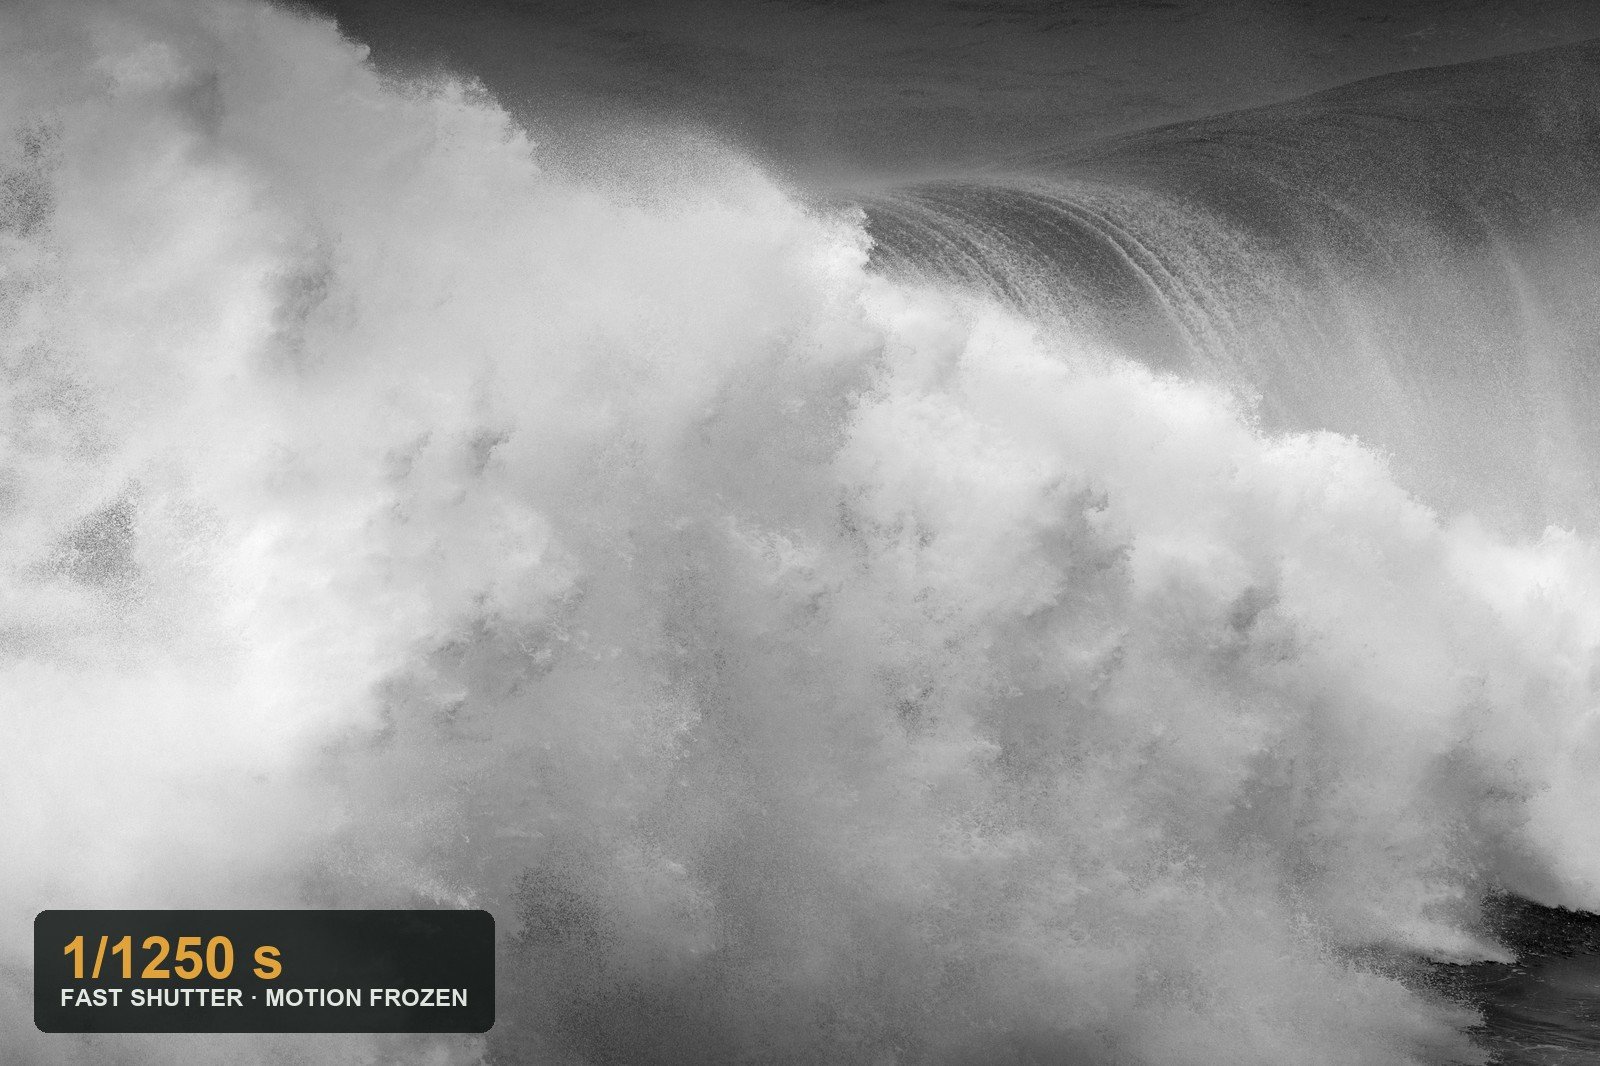
A fast shutter speed opens and closes so quickly that even a fast-moving subject barely shifts during the exposure — so it lands on the sensor crisp and stopped. This is how you catch a bird mid-wingbeat, a breaking wave with every droplet hanging in the air, or a dog shaking off water with each fling caught sharp.
How fast is “fast”? It scales with how quickly the subject crosses your frame:
| Subject | Rough starting speed |
|---|---|
| Splashing water, breaking waves | ~1/1000 s |
| Birds in flight, running animals | ~1/1000–1/2000 s |
| Wind-shivered leaves you want sharp | ~1/500 s |
These are starting points, not laws — a bird flying straight at you crosses fewer pixels than one streaking across your view, so it needs less speed to freeze. The trade-off is honest: a fast shutter is a brief shutter, so it lets in less light. To keep exposure balanced you’ll usually open the aperture wider or raise ISO. Lean on aperture first and keep ISO as low as the shot allows — a sharp-but-slightly-noisy frozen wave beats a blurry clean one, but don’t reach for ISO before you’ve opened up.
Slow shutter: turning time into texture
Go the other way and motion becomes a material you paint with. Hold the shutter open and anything that moves during the exposure records as blur — and that blur is often the whole point of the picture.
- Silky water — around 1 to several seconds smooths a river or waterfall into flowing ribbons and turns choppy sea into low-lying mist.
- Streaking clouds — tens of seconds to several minutes stretches drifting cloud into long brushstrokes that pull the eye through the sky.
- Light trails — at night, a few to many seconds turns traffic into continuous rivers of red and white.
- Wind in the landscape — a second or two lets grass, reeds, or flowers blur into a soft, breathing texture while solid ground stays sharp.
The catch: a long shutter floods the sensor with light, so in daylight a multi-second exposure blows out to pure white long before you get there. The fix is a neutral-density filter — effectively sunglasses for the lens that cut the light so you can use those long, creative speeds in broad daylight. That’s its own craft, covered in the long exposure photography guide.
Panning: a sharp subject on a streaking world
There’s a third option that blends both. Panning means tracking a moving subject with your camera while using a moderately slow shutter — roughly 1/30 to 1/125 s, depending on how fast the subject moves. Because the camera moves with the subject, the subject stays sharp while the background smears into horizontal streaks. The result is a powerful sense of speed and motion that a frozen frame can’t give you.
It takes practice. Plant your feet, swivel from the hips, and keep the subject locked in the same spot of the frame before, during, and after you press the shutter — the follow-through is what keeps it smooth. Expect to throw away most of your attempts at first; the keepers are worth it. Start slow (1/60 s for a cyclist or running animal) and lengthen the exposure as your tracking improves for ever-more-dramatic streaking.
Staying sharp: the handheld floor
Blur you choose is art; blur from a shaky grip is just a ruined photo. Even when your subject is dead still, you aren’t — your own micro-movements smear the frame if the shutter stays open too long. The classic rule of thumb:
Keep your shutter speed at least as fast as 1 over your focal length.
So on a 200 mm lens, stay at 1/200 s or faster; on a 50 mm lens, 1/50 s is your floor; on a wide 24 mm, you can dip to around 1/30 s. Longer lenses magnify shake along with the scene, so they demand faster speeds. Treat this as a conservative starting point, not a guarantee — on a high-resolution sensor, where every pixel is smaller, go a stop or two faster, because the same wobble now spans more pixels. In-body or lens stabilization buys you a few extra stops, but it can’t stop subject motion.
When you genuinely need a slow shutter — any of the silky-water, cloud-streak, or light-trail effects above — the floor rule no longer applies, because the answer isn’t a faster shutter, it’s eliminating camera movement entirely. Put the camera on a tripod and fire it with a remote release or the self-timer so even your finger press doesn’t nudge it. A two-second timer is the free version of a remote and works almost as well.
Choosing the speed: effect first, number second
The whole skill collapses into one habit: decide what you want motion to do, then choose the speed that does it.
- Want the moment stopped — every droplet, every feather? Go fast (1/1000 s and up).
- Want motion to become flow — silk water, streaking cloud, light rivers? Go slow (a second to minutes), on a tripod, with an ND filter in daylight.
- Want speed itself — a sharp subject against a rushing world? Pan at a moderate slow speed and follow through.
When you’re unsure what a given speed will actually produce — how long an exposure a scene needs, or whether a subject will freeze or streak — work it out before you commit the shot rather than chimping afterward. The app’s photography calculators help you reason from the effect you want to the settings that get there, and Viewpoint is built to plan that decision in the field, so you’re choosing the picture rather than guessing at it.
Quick-start checklist
- Decide the effect first — frozen, flowing, or panned — then set the speed.
- Freeze action at ~1/1000 s and faster; faster still for birds and breaking water.
- Blur water at ~1–several seconds, clouds at tens of seconds to minutes — tripod required.
- Pan at ~1/30–1/125 s, tracking the subject smoothly and following through.
- Handheld floor: shutter at least 1 over your focal length (faster on high-res sensors).
- Going slow in daylight? Reach for a neutral-density filter and a remote or timer.