🖼️ Composition
Foreground interest: giving a landscape depth
Foreground interest is what turns a flat snapshot into a photo you can step into. The depth a landscape feels almost always comes down to what's happening at the bottom of the frame — master it and you control how three-dimensional a scene reads.
A camera flattens the world. Your eyes judge distance using two slightly different views and constant tiny movements; a single frozen frame throws all of that away, collapsing a deep valley into a flat rectangle. Foreground interest is how you put the depth back — and it’s a learnable, repeatable skill, not a lucky accident. Get it right and a viewer’s eye walks into the photo the way your feet walked into the landscape.
Think in three layers
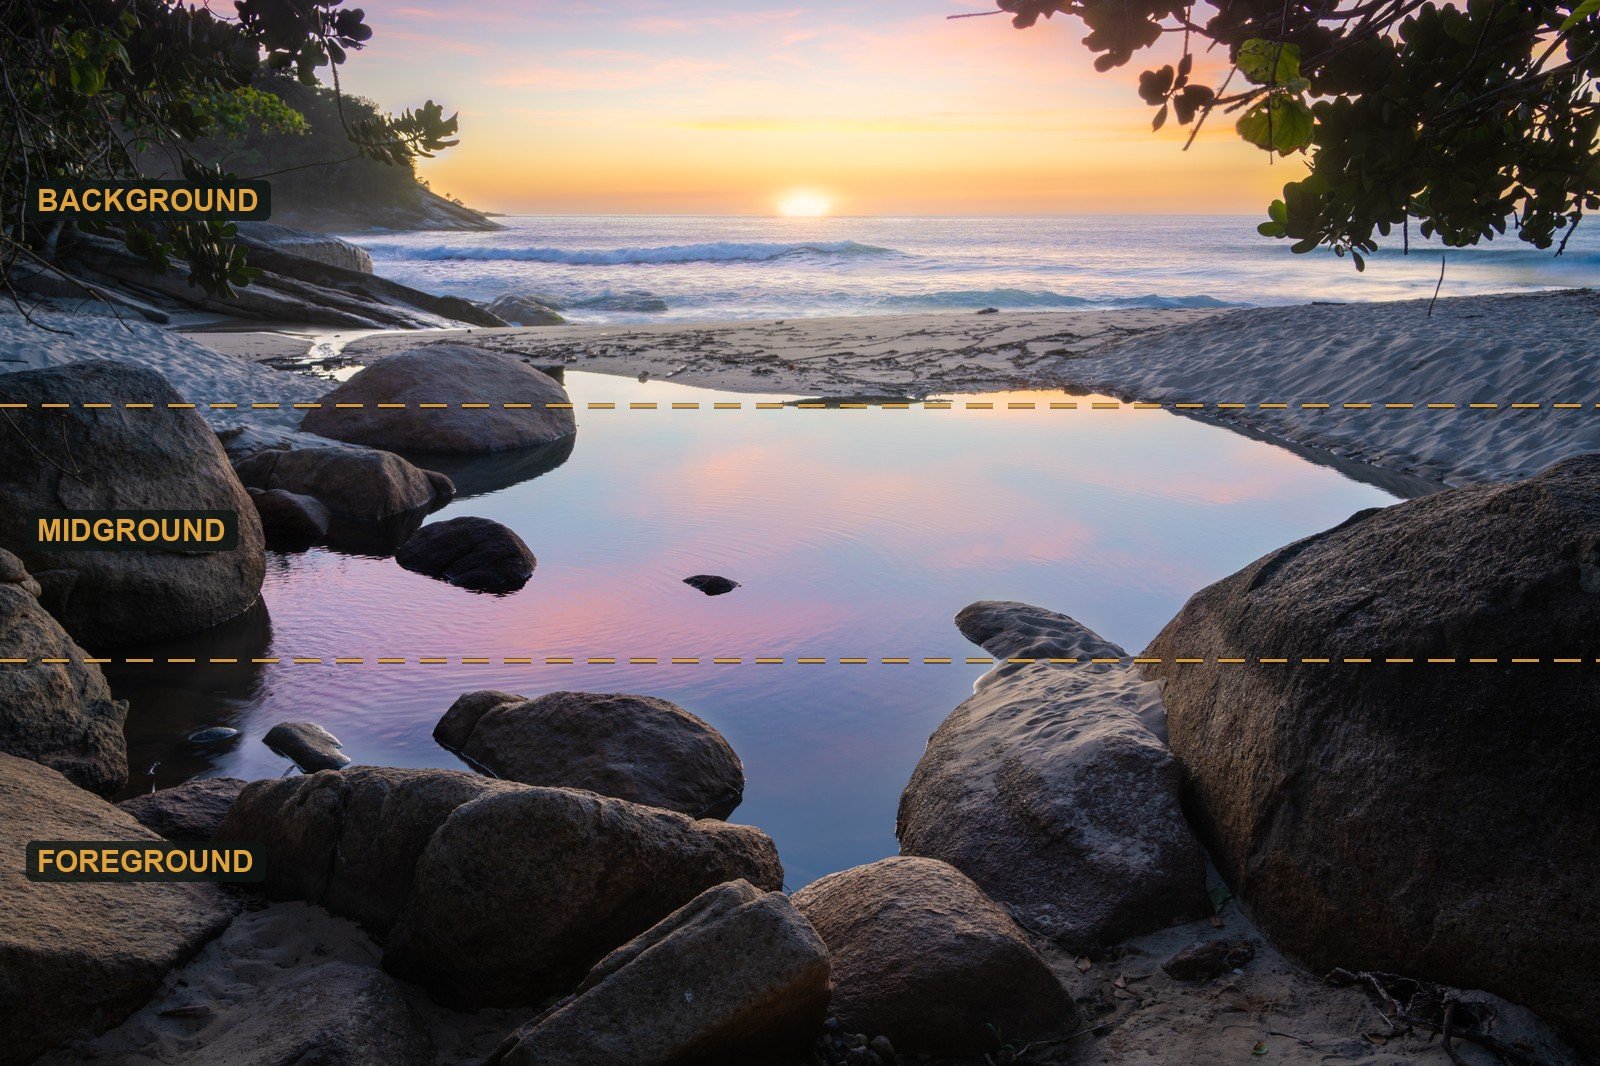
The most reliable way to build depth is to consciously split your scene into three planes:
- Foreground — the near element, close to the lens, anchoring the bottom of the frame.
- Midground — the connective tissue: a slope, a stretch of water, a band of trees that carries the eye back.
- Background — the distant subject, usually the “headline” of the shot — a peak, a coastline, a sky.
A photo with all three reads as three-dimensional because the viewer’s brain infers distance from the relationship between them. A near rock that looks large, a mid-distance shoreline that looks smaller, and a faraway mountain that looks smaller still give the brain the size cues it needs to reconstruct depth. Strip out the foreground and you’re left with a midground and background floating in space — pleasant, but flat.
The foreground is doing the heavy lifting here, which is why choosing it well matters more than any other single decision. Strong candidates share one trait: texture and shape that reward a close look. Think a lichen-covered boulder, a cluster of wildflowers, cracked patterns in lake ice, a tide pool catching the sky, or wind-rippled sand. These aren’t random — each gives the eye an interesting place to start before it travels deeper.
Go wide, get low, get close
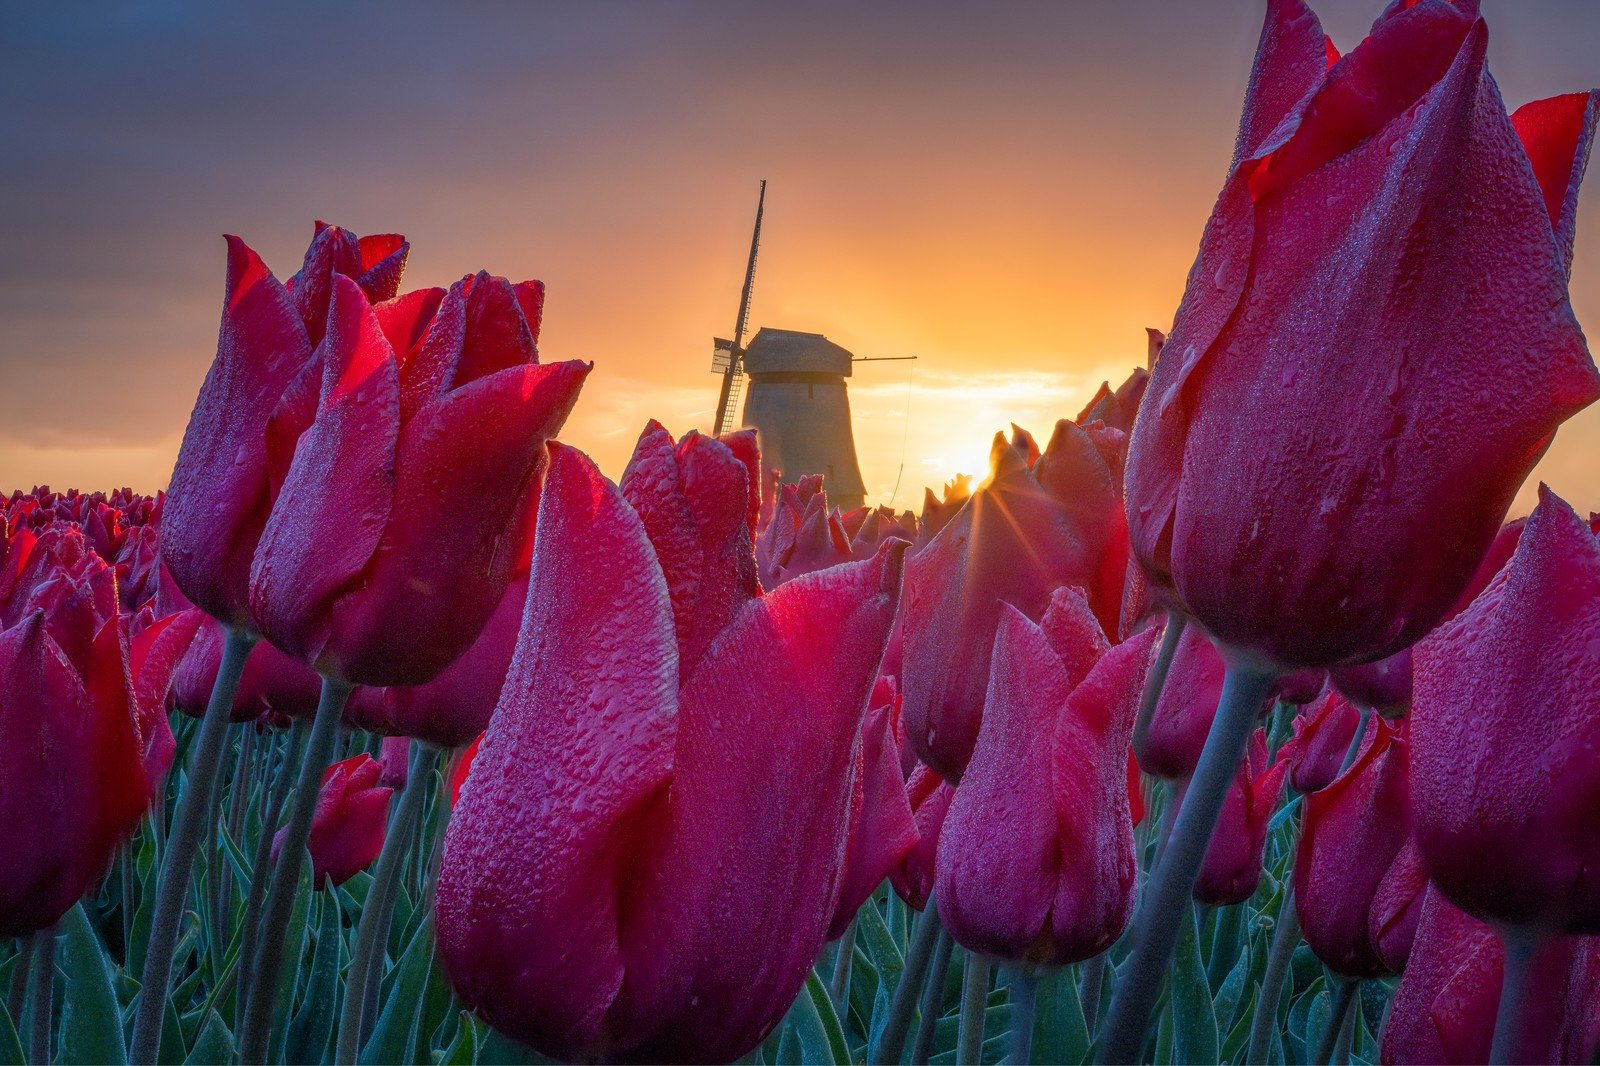
Here’s the technique that makes foregrounds sing: a wide-angle lens (roughly 14–35 mm on full frame) exaggerates the foreground. Because a wide lens takes in a large angle of view, near objects are rendered large relative to distant ones — the rock at your feet looms while the mountain shrinks. That dramatic size difference is exactly the depth cue your brain reads as distance. A telephoto does the opposite: it compresses layers so they stack flatly.
To amplify the effect, get low and get close. Drop the camera near the foreground element — sometimes just centimetres away — and the perspective stretches even harder. A pebble can read as monumental; a patch of frost can fill the lower third of the frame and pull the eye into a distant ridge. This is where most depth is won or lost: a wide lens used from standing eye-level wastes its power, because the foreground sits small and far below you.
This sits inside the broader toolkit of composition for landscape photography, and it pairs naturally with leading lines: guiding the eye through a landscape — a foreground anchor gives a leading line somewhere to begin, so a riverbank, a fence, or a stretch of wet sand carries the eye from your near element back through the layers.
Solve the sharpness problem
The catch: when your foreground is centimetres away and your background is kilometres off, no lens can naturally focus on both at once. To get the front-to-back sharpness that depth-layered shots demand, you have two tools.
1. Small aperture + hyperfocal focusing. A smaller aperture (a larger f-number) deepens the zone of acceptable sharpness. Combine it with hyperfocal focusing: focus at a specific distance — the hyperfocal distance — and everything from half that distance out to infinity renders acceptably sharp. The maths is H = f² / (N · c) + f, where f is focal length, N the f-number, and c the sensor’s circle of confusion; focus at H and your sharp zone runs from H/2 to the horizon. In practice this means don’t focus on the mountain — focusing at infinity throws away half your depth of field behind it. Focus roughly a third into the scene instead. A wide lens at f/11 will often hold everything from a metre out to the horizon.
One honest limit: stopping down past about f/16 on full frame starts to soften the whole image through diffraction, where light bending around the tiny aperture grows beyond the sharpness threshold. So you can’t just keep closing the aperture forever.
2. Focus stacking. When the foreground is so close that even a small aperture can’t hold both ends sharp without diffraction, shoot several frames at a clean aperture (say f/8–f/11) — one focused on the near rock, one on the midground, one on the distance — and blend them later, taking the sharpest pixels from each. It’s the cleaner route to extreme front-to-back sharpness, at the cost of a few extra frames and a tripod.
Either way, dialling in the focus point by hand beats guessing. A photography calculator for hyperfocal distance gives you the exact distance to focus at for your lens, aperture, and sensor — no more “focus a third in and hope.”
Light the texture, and know when to break the rule
A textured foreground only reads as textured if the light reveals it. Side-light or low-angle light — sun raking across the scene rather than hitting it head-on — casts the small shadows that make ridges, ripples, and grain pop. This is one reason golden hour is prime: the low sun is naturally side-on. Flat light (overcast, or front light with the sun behind you) erases those micro-shadows and kills the very texture you chose the foreground for. Same rock, same composition — the light decides whether it has presence or none.
Two cautions to keep this non-dogmatic:
- A weak or cluttered foreground is worse than no foreground. If the near element competes with your subject instead of supporting it, or it’s just busy mess, drop it. A clean midground-to-background composition beats a confused three-layer one every time.
- Depth isn’t always the goal. Minimalist, compressed, or abstract images often work because they’re flat. These tools are reliable, not mandatory — reach for them when the scene wants to feel deep, and set them aside when it doesn’t.
Foreground hunting is also why scouting pays off: the best near anchors — that one ice-cracked tide pool, the patch of cotton grass below the ridge — are found by walking the location, not by arriving at the viewpoint and shooting straight ahead. Mark them when you find them, so you’re ready when the side-light arrives.
Quick-start checklist
- Layer the scene: find a foreground, a midground, and a background before you set up.
- Choose a strong near anchor — texture and shape that reward a close look, not clutter that competes.
- Go wide, low, and close to exaggerate the foreground and stretch the sense of depth.
- Set front-to-back sharpness: small aperture plus hyperfocal focusing (focus a third in, not at infinity), or focus-stack when one aperture can’t do it.
- Wait for side-light or low-angle light to reveal foreground texture; skip flat light.
- Scout the foreground on location — the best anchors are found by walking, not standing at the viewpoint.