🖼️ Composition
Leading lines: guiding the eye through a landscape
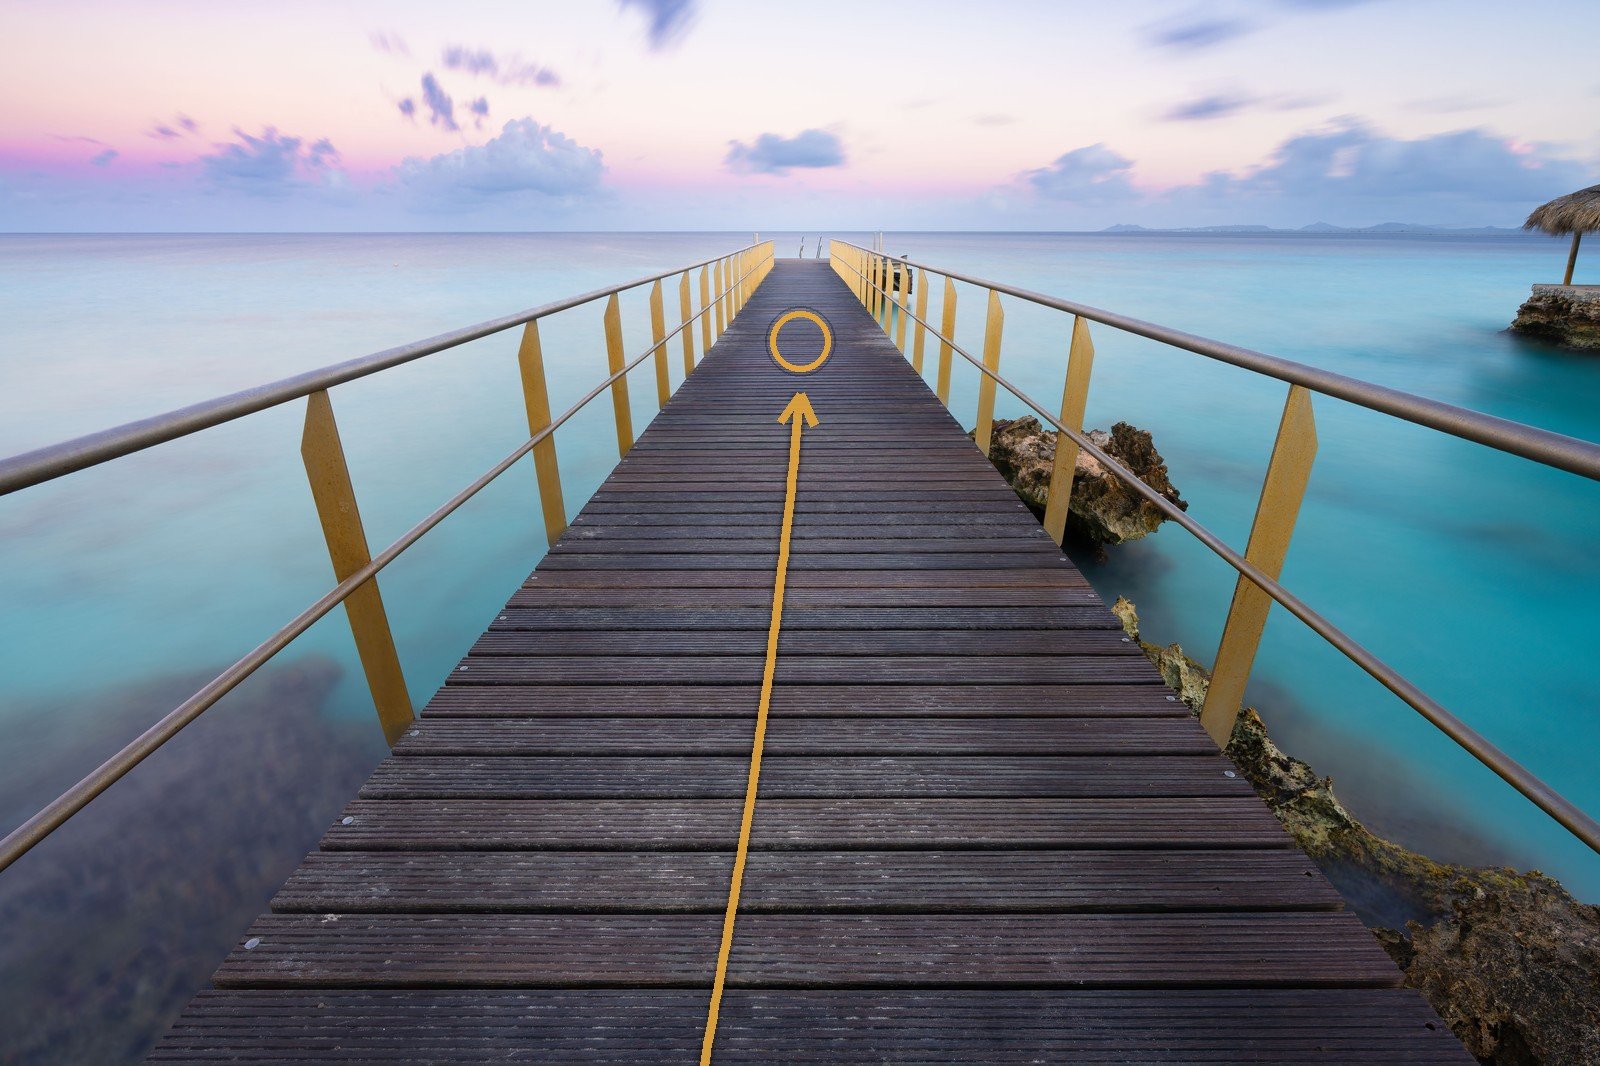
A path, a river, a fence row receding into the hills — your eye follows it before you've decided to. That pull is one of the most reliable tools in landscape photography, and once you can see lines on location you can aim them at exactly what you want noticed. Here's how leading lines work and how to wield them.
Your eye is lazy in a useful way: drop it into a photograph and it slides along any line it finds, the way it follows a road on a map. Leading lines are the visual lines already sitting in a landscape — a trail, a shoreline, a fence, a ridgeline, rows of vines, a wooden jetty, even streaks of light — that you arrange so they carry the viewer’s gaze into and through the frame. Done well, a line does two jobs at once: it builds a sense of depth, and it gives the picture a feeling of journey, as if the viewer could step in and walk it. That’s why a competent line can rescue an otherwise flat scene, and why it sits near the top of the toolkit in any guide to composition for landscape photography.
This is craft, not law. A line that fights your subject is worse than no line at all. So the skill isn’t “find a line” — it’s seeing which line, pointing it at what, and shooting from where.
The kinds of lines and what each one does
Lines aren’t interchangeable. Each shape carries its own feeling, so pick the one that matches the mood you’re after.
- Converging lines run away from the camera and appear to meet at a distant vanishing point — think a straight track narrowing to a dot, or the two banks of a river pinching together near the horizon. Convergence is the strongest depth cue you have, because shrinking-toward-a-point is exactly how your brain reads distance in the real world.
- S-curves wind back and forth as they recede — a meandering stream, a coastal path, a sandbar. They feel graceful and natural, easing the eye through the scene rather than firing it straight back, and they fill more of the frame on the way, so the foreground stays interesting.
- Diagonal lines cut across the frame at an angle. They carry energy and tension that horizontals and verticals don’t — a horizon line sits still, but a diagonal feels like motion. Tilt a line off the level (without tilting the horizon, which should stay straight) and the image wakes up.
- Implied lines aren’t continuous at all. A row of fence posts, stepping stones, or wind-bent trees reads as a line because your eye joins the dots. So does a direction of gaze — a figure looking toward the mountains pulls the viewer the same way. Implied lines are everywhere once you start hunting for them.
A quick reference:
| Line type | What it does | Reach for it when |
|---|---|---|
| Converging | Maximum depth, pulls to a point | You want the scene to feel deep |
| S-curve | Graceful, flowing, fills the frame | The path itself is part of the story |
| Diagonal | Dynamic, adds tension | The scene feels static and needs energy |
| Implied | Subtle, works through repetition or gaze | No literal line exists, but order does |
Aim the line — into the frame, toward a subject
A line is a pointer, so two things decide whether it works: where it enters and where it ends.
Position yourself so the line enters from a corner or the near foreground and travels inward. A line that exits the frame — running off the side, dead-ending at the edge — escorts your viewer straight out of the picture, the opposite of what you want. Corners are ideal entry points because the diagonal across the frame is the longest, most dynamic route through it.
Then give the line somewhere to arrive. A leading line needs a strong end-point — the subject it delivers you to: a lone tree, a barn, a peak, the sun sitting on the horizon. Without that resolution the eye races to the end of the line and finds nothing, and the image feels unfinished, a sentence with no full stop. Place that subject near a rule-of-thirds intersection and let the line do the work of escorting the eye to it. The line creates the depth; the subject pays it off.
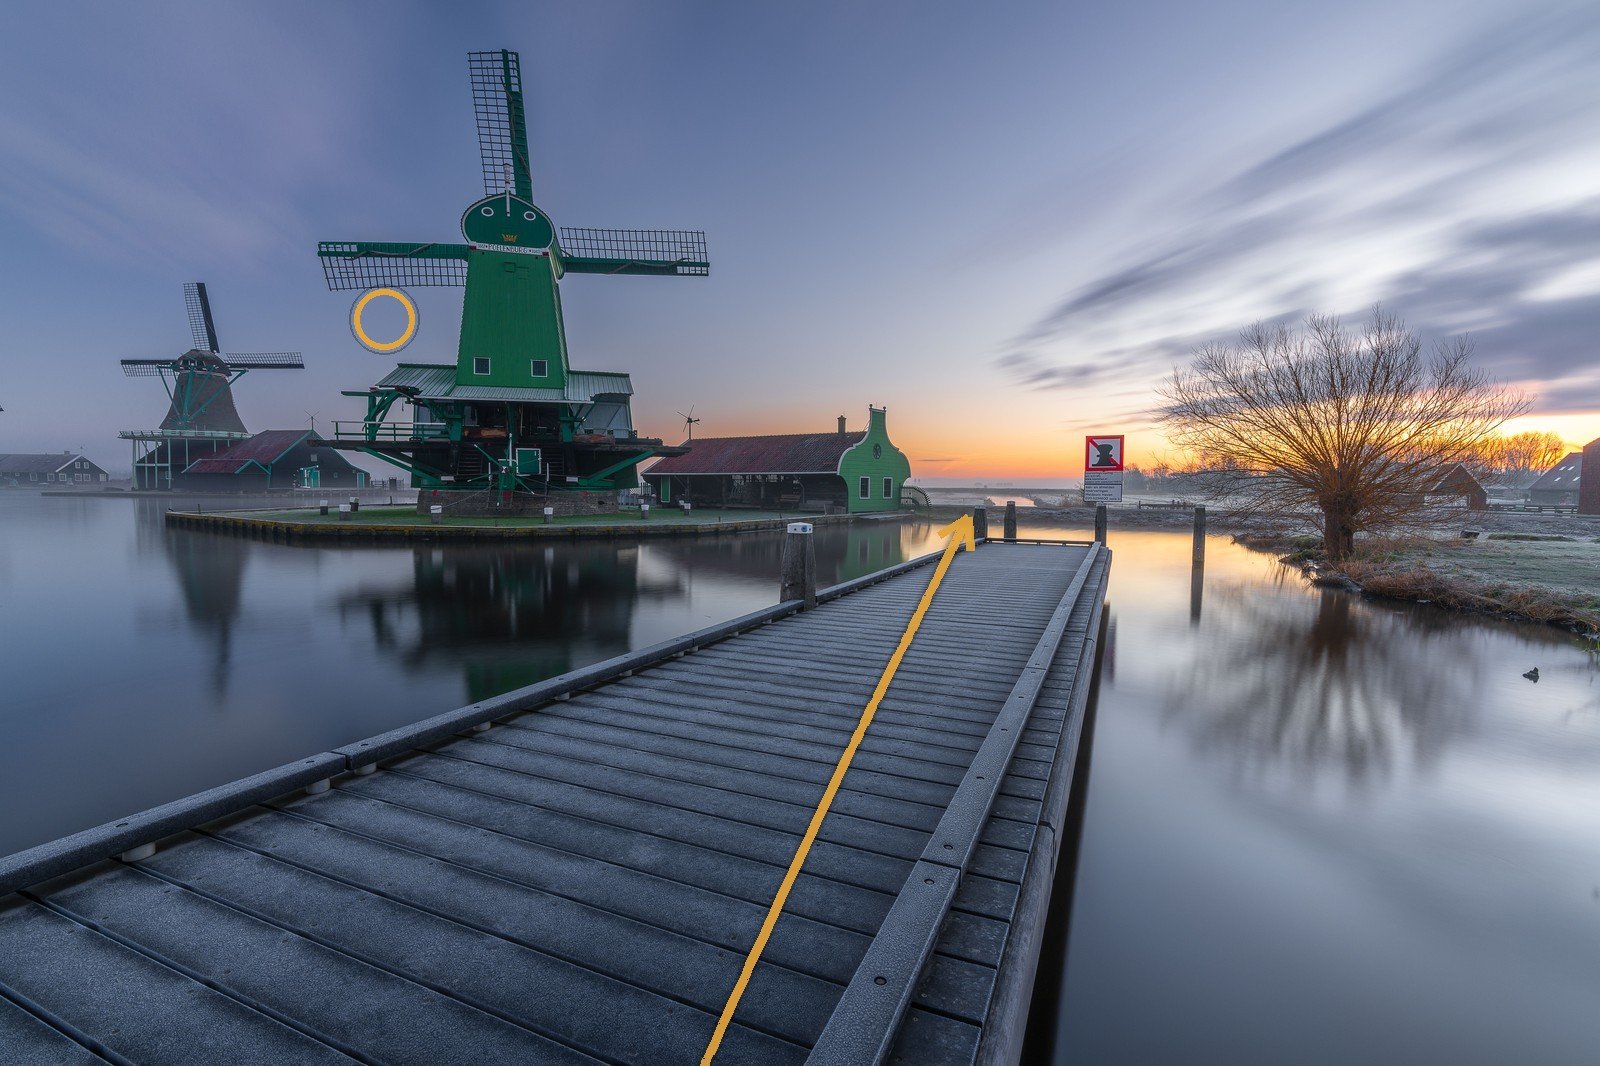
One honest caveat: not every line should point at a hard subject. A line that leads to an open horizon or a glowing sky can resolve perfectly well — the light becomes the destination. The rule isn’t “always have an object,” it’s “always have a resolution.”
Get low, get close, go wide
How you stand changes a line more than which line you pick. Three moves stack together:
- Get low. Dropping the camera toward the ground brings the start of the line right up to the lens and stretches it across more of the frame. A path shot from standing height is a thin ribbon; the same path from knee height fills the foreground and surges into the distance.
- Get close to where the line begins. The nearer you are to its starting point, the more the line dominates and the stronger the pull.
- Go wide. A wide-angle lens exaggerates the nearest part of a scene — near things loom large, far things shrink fast. Point that effect down a leading line and it stretches the closest segment dramatically while the far end races to its vanishing point, amplifying both the depth and the sense of journey. (Be aware of the trade: wide lenses also push the subject at the end of the line smaller, so a converging line pulling to a distant peak can leave that peak tiny. Sometimes a moderate focal length keeps the destination readable.)
Getting low and wide is also exactly the recipe for strong foreground interest that gives a landscape depth — the two techniques are siblings. The catch is that a near foreground plus a distant subject demands front-to-back sharpness, and a wide lens at close range stretches focus to its limit. You get that sharpness two ways: stop down to a small aperture (roughly f/11–f/16) and focus at the hyperfocal distance — the focus point that holds everything from half that distance to infinity acceptably sharp — or, when even that won’t cover a very close foreground, focus stack by shooting several frames focused at different depths and blending them. Sharpness front to back is what lets the eye actually travel the whole line.
Find your lines before you press the shutter
Leading lines reward scouting, because the best ones depend on a vantage point you have to find — the spot where the trail enters the corner and the peak lands at the third. Walk the location. Try the same line from standing height and from a crouch; from one bank and the other. Watch for lines that only appear at certain times: a wet road that mirrors the sky after rain, light trails at dusk, low side-lit shadows that rake a diagonal across a field at golden hour.
This is where having your shortlisted spots, sun angles, and conditions in one place pays off — Viewpoint is built to help you plan the angle and timing on location, so when the light arrives you already know where to stand and which line to aim.
Quick-start checklist
- Spot the line first — path, river, fence, ridge, light trail, or an implied row of objects.
- Enter from a corner or foreground and lead inward, never off the edge.
- Give it a destination — a subject or a strong sky at the end so the eye resolves.
- Get low and close to the line’s start, and go wide to stretch the nearest part.
- Hold sharpness front to back — small aperture + hyperfocal focus, or focus stack a very close foreground.
- Scout the vantage — try crouched vs. standing, both sides, and the time of day that lights the line best.