🌊 Long Exposure & ND
ND filters explained: which strength to choose

A neutral-density filter is the one piece of glass that lets you paint with time in broad daylight — turning surf into mist and a busy sky into streaks. The only real decision is strength, and once you understand what a "stop" buys you, choosing becomes simple arithmetic rather than guesswork.
A neutral-density (ND) filter is just dark glass that dims the scene evenly across every colour. That evenness is the whole point: it cuts the amount of light reaching your sensor without tinting the image, so you can leave the shutter open far longer than daylight would normally allow. Longer shutter, more motion captured — moving water turns silky, clouds smear into streaks, crowds dissolve to ghosts, while the rocks and trees stay razor-sharp. Get the physics straight and the buying decision answers itself.
Stops: the only number that matters
ND strength is measured in stops of light cut. One stop halves the light, which means it doubles the shutter time you can use. Two stops quarter the light and quadruple the time, and so on — the effect compounds fast.
You’ll see two labelling systems on the same filter, which trips people up:
| Stops | “ND number” | What it does |
|---|---|---|
| 3 | ND8 | Modest slowing — a waterfall in shade, gentle motion |
| 6 | ND64 | The daylight all-rounder for silky water |
| 10 | ND1000 | Very long daytime exposures — smooth seas, streaking cloud |
The “ND number” is the factor by which light is divided (ND8 = light cut to one-eighth = 3 stops, since 2³ = 8). You only need to know the stop count; the marketing number is a synonym. Note these are neutral and ungraduated — they darken the entire frame uniformly, which is exactly what a motion-blur shot wants.
Choosing your strength
Match the filter to the brightness and the look you’re after.
- 3-stop (ND8) — for shade and overcast, or when you only want a hint of movement. A forest waterfall out of direct sun, where you’d otherwise be a stop or two short of a slow enough shutter.
- 6-stop (ND64) — the versatile all-rounder. In open daylight this is enough to render moving water silky without going so dark you lose the texture entirely. If you buy one filter, buy this.
- 10-stop (ND1000) — for very long daytime exposures: glassy seas, clouds dragged into ribbons, people vanishing from a square. Ten stops turns a 1/15 s reading into roughly a minute-long frame in bright conditions.
The maths is simple: new time = base exposure × 2^stops. Meter the scene without the filter to get your base, then apply the multiplier. A 10-stop is far too dark to meter or focus through, so always compose and lock focus first, then fit the glass. Viewpoint’s long exposure & ND filters guide walks the full workflow, and the how to photograph silky water guide pairs strengths to the water look you want.
Stacking and variable NDs
Need more darkness than a single filter gives? Stacking two NDs adds their stops: a 6-stop plus a 10-stop equals 16 stops, deep enough for minutes-long frames under bright sun. The cost is real, though — each extra layer of glass pushes the edges toward vignetting (darkened corners, worst on wide lenses) and compounds any colour cast. Stack only when you genuinely need the reach.
A variable ND is one rotating filter that sweeps through a range — typically something like 2–5 or 6–9 stops — by turning a ring. It’s a brilliant convenience: one piece of glass, no swapping. The catch is that cheaper variable NDs reveal an uneven dark X-cross across the frame at their strongest setting, a band of shadow no edit fully rescues. Stay a notch back from maximum, or invest in a better filter, and the X stays away.
Systems, casts, and the graduated cousin
Screw-in vs square is the mounting choice:
- Screw-in filters thread onto your lens by diameter. To share one across lenses, buy it for your largest thread and use cheap step-up rings on the smaller ones.
- Square (drop-in) filters sit in a holder that clamps to any lens via an adapter ring. Pricier and bulkier, but they share across your whole kit and let you stack graduated filters in front of the ND.
That brings up the graduated ND (GND) — a genuinely different tool, not a strength option. A GND is dark on top and clear on the bottom, made to darken only a bright sky so it balances against a darker foreground in one frame. It does nothing for motion. Don’t reach for a GND when you want silky water; reach for a plain ND.
One honest caveat: cheaper NDs aren’t perfectly neutral. They drift the image toward magenta or a warm cast, stronger at higher densities and when stacked. The fix is easy — shoot RAW and correct the white balance afterward, where the cast lifts out in seconds. It’s a reason to favour known-good glass for your 10-stop, where the cast bites hardest.
How to build your kit
Most landscape shooters land in the same place: a 6-stop plus a 10-stop. The 6 covers everyday daylight motion; the 10 unlocks the dramatic minutes-long looks. Stack them when you want 16. A 3-stop is a nice-to-have for shade, and a quality variable ND can stand in for the whole range if you value packing light over ultimate image purity.
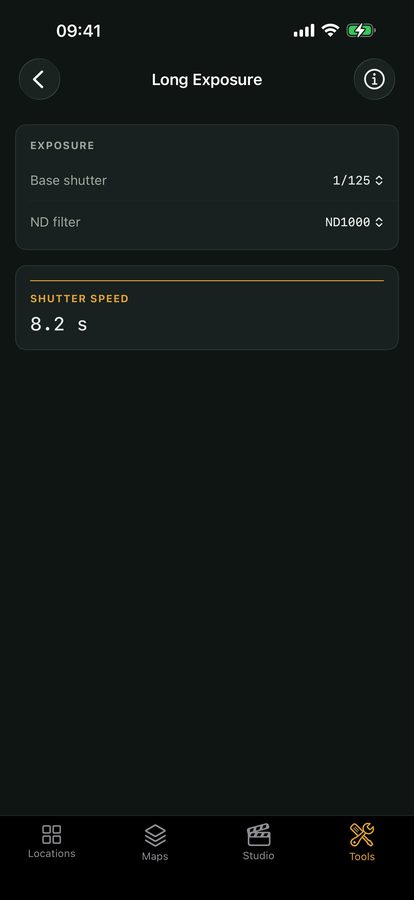
Whichever you carry, the last step is timing. Once you’ve metered your base exposure and chosen a strength, Viewpoint’s photography calculators turn that ND value and your base reading straight into the shutter time to dial in — no powers of two in your head on a cold headland.
Quick-start checklist
- Start with a 6-stop for everyday daylight water and cloud.
- Add a 10-stop for glassy seas and streaking skies; stack the two for 16.
- Compose and lock focus first, then fit the dark glass — never meter through a 10-stop.
- Shoot RAW so you can correct the magenta or warm cast cheaper NDs add.
- Back off a variable ND from its maximum to dodge the uneven X-cross.
- Run the numbers through the calculator instead of doubling by hand.