🎨 Editing & Processing
How to edit RAW landscape photos: a simple workflow
A RAW file looks flat and grey straight off the card — and that's the point: it's holding on to every bit of highlight and shadow so *you* decide the look, not the camera. The trouble is that most beginners push the wrong sliders in the wrong order and end up with a crunchy, over-saturated version of a scene that was quietly beautiful to begin with. Editing well isn't a bag of tricks; it's a repeatable order of operations. Here's the sequence that keeps a landscape looking like the place you actually stood in.
Ask ten landscape photographers how they edit and you’ll get ten answers — but watch them work and the good ones all move through the same broad order: fix the light globally, shape the colour, do the local clean-up, and sharpen for the screen or print at the very end. The order is the skill. Sharpen before you’ve set your tones and you sharpen noise you were about to remove; crank saturation before you’ve fixed white balance and you’re amplifying a colour cast. This guide walks that order once, plainly, with Lightroom as the worked example — but every step maps onto Capture One, darktable, the mobile apps, or whatever you already use, because they all expose the same underlying controls.
Why RAW gives you room to work
A JPEG is a decision the camera already made: it picked the white balance, the contrast and the sharpening, threw away the data it didn’t need, and baked the result in. A RAW file keeps the sensor’s full readout — far more tonal range in the highlights and shadows, and no colour or contrast locked in. That’s why it looks dull and low-contrast on the back of the camera: nothing has been interpreted yet. The payoff is latitude. You can recover a blown-looking sky, lift a foreground out of shadow, or completely reset the white balance after the fact — moves that tear a JPEG apart but a RAW file shrugs off. Shooting RAW is what makes everything below possible.
The order that matters
Here’s the whole sequence in one place. Work top to bottom and resist the urge to jump ahead:
- White balance — get the colour of the light neutral (or deliberately warm) first, because every later decision depends on it.
- Global tone — exposure, highlights, shadows, whites and blacks, then contrast. Set the overall brightness and where the darkest and lightest points sit.
- Colour — vibrance and saturation, then targeted hue/saturation/luminance tweaks.
- Local adjustments — masks to dodge and burn, balance a sky against a foreground, draw the eye.
- Detail — noise reduction, then sharpening (always in that order).
- Output — crop, then resize and output-sharpen for the specific place the photo is going.
Everything after this is just each step in a little more detail.
Step 1 — Set the white balance first
White balance is the colour temperature of the light, and it’s step one because it changes how every other adjustment reads. Use the eyedropper on something that should be neutral grey — wet rock, a cloud, weathered wood — to get an honest starting point, then warm it or cool it to taste. Landscapes usually want a touch of warmth at golden hour and a cooler, bluer cast at blue hour, but “correct” is whatever matches the feeling of being there. Nail this now and your colours fall into place later; skip it and you’ll spend the rest of the edit fighting a cast.
Step 2 — Fix the global tones
Now shape the light across the whole frame, brightest and darkest points first:
- Exposure sets the overall brightness — get the midtones roughly right before anything else.
- Highlights down and Shadows up is the classic landscape move: it pulls detail back into a bright sky and opens up a dark foreground, flattening the scene so you have room to rebuild contrast deliberately.
- Whites and blacks set the true endpoints. Nudge whites up until the brightest highlight is just short of clipping, and blacks down until the deepest shadow reads as a genuine black — this is what gives a flat RAW its “pop” without touching a contrast slider.
- Contrast and the tone curve come last in this step, to taste, once the endpoints are set.
The goal is a balanced, natural-looking frame with detail from corner to corner — not a finished look yet, just a clean foundation.
Step 3 — Shape the colour
With tones set, turn to colour — gently. Reach for vibrance (which protects already-saturated tones and skin) before saturation (which shoves everything up at once and is the fastest way to make a landscape look fake). Then get specific with the HSL / colour-mix panel: dial the luminance of a blue sky down to add drama, ease the saturation of an over-cooked green, or shift a yellow autumn tone toward orange. The tell of an over-edited landscape is almost always colour — radioactive grass, purple-black skies. If a viewer notices the saturation before the scene, you’ve gone too far.
Step 4 — Local adjustments, not global ones
Global sliders move the whole image; the finishing touches are local. Modern editors let you mask by brush, gradient, or automatic sky/subject selection:
- Balance the scene — a graduated mask to bring a bright sky down a stop so it doesn’t overpower a darker foreground (the in-software answer to a graduated ND filter you didn’t carry).
- Dodge and burn — lighten the path your eye should follow, darken the edges and distractions. This is how you shape depth and lead a viewer through the frame.
- Local clean-up — a touch more clarity on a rock face, a little warmth on a patch of catching light.
Keep every local move subtle. The best ones are invisible — the viewer feels the depth without ever seeing the edit.
Step 5 — Noise reduction, then sharpening
Order matters more here than anywhere else. Always reduce noise before you sharpen — sharpen first and you’ll etch the grain permanently into the image, then noise reduction smears the now-crunchy detail. Apply luminance noise reduction (heavier for high-ISO night frames, barely any for a clean low-ISO daytime shot), then add capture sharpening to restore edge crispness. If your shot was already clean at base ISO, both can be gentle.
Step 6 — Crop and export for where it’s going
Last, decide the frame and the destination. Crop for composition — the rule of thirds, a level horizon, a clean edge with nothing awkwardly clipped. Then export for the specific place the photo will live, because sharpening and size depend on it: a print wants full resolution and stronger output sharpening; a website or a social post wants a smaller long edge and lighter sharpening so it doesn’t turn to halos and artefacts when the platform re-compresses it. This “output sharpening” is a separate, final pass on top of the capture sharpening in step five — resize first, then sharpen for the new size.
Develop with intent — then share it
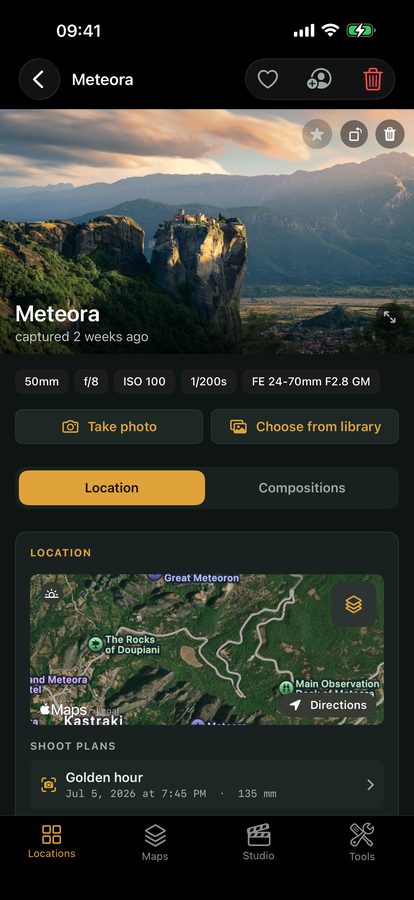
The hardest part of editing a landscape isn’t the sliders; it’s remembering what you were trying to make. Open a RAW three weeks after the shoot and the light you chased has faded from memory — so you drift, and the edit ends up generic. This is where the field work pays off. Viewpoint keeps your result photo’s settings — focal length, aperture, ISO, shutter — on the spot where you shot it, alongside your own notes and the sun and weather at the moment of capture. Opening that before you develop reroots you in the picture you actually planned: “I came here for the low side-light on the ridge” is a very different starting point from a cold thumbnail. And when the edit’s done, Viewpoint’s Studio turns the finished frame into a carousel, reel, or a behind-the-scenes card ready to post to your feed — the last step of a shot that began with a plan.
Quick-start checklist
- Shoot RAW — it’s the latitude that makes all of this possible.
- White balance first — neutral or deliberately warm, before anything else.
- Global tone next — exposure, then highlights down / shadows up, then set whites and blacks to the endpoints, then contrast.
- Colour after tone — vibrance before saturation; fix casts and over-cooked greens in HSL.
- Local last — mask to balance sky and foreground, dodge and burn to lead the eye.
- Noise reduction, then sharpening — never the other way round.
- Crop and output-sharpen for the destination — resize first, sharpen for print vs screen separately.
- Edit with intent — reopen your capture settings and notes so you finish the shot you planned, then share the result.